
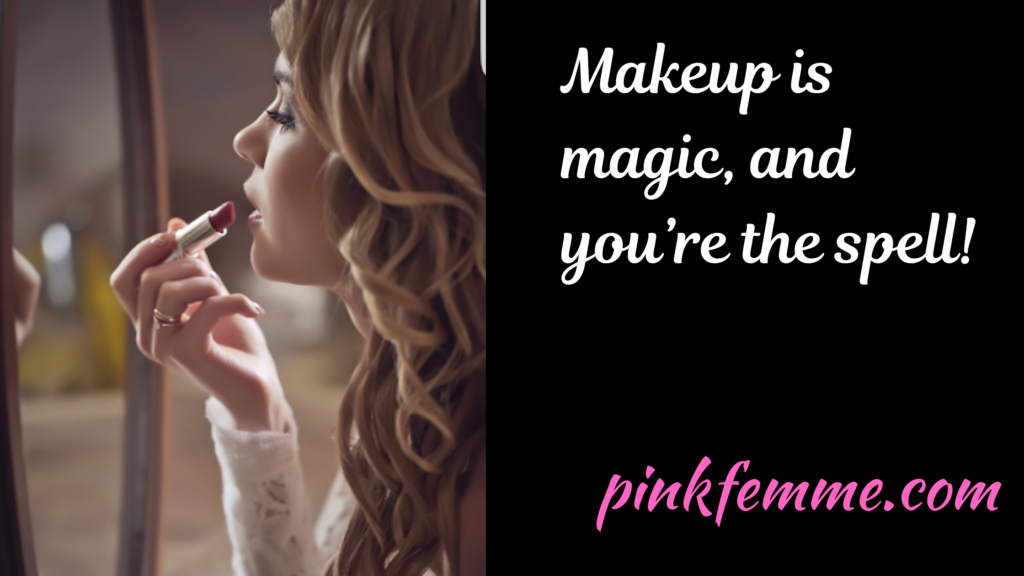
I still remember the first time I experimented with makeup—sneaking into my sister’s room, swiping on a bright red lipstick, and instantly feeling like a whole new version of myself. Makeup is powerful like that. It’s not just about covering up imperfections; it’s a way to express yourself, play with different styles, and highlight the features you love most. Whether you’re exploring makeup for the first time, looking to refine your skills, or just want to have some fun with new looks, I’ve got you covered.
The ultimate makeup guide for beginners covers everything from essential tips and tools to easy-to-follow tutorials. You’ll learn how to choose the right products, master key techniques, and create stunning looks that suit your unique style. Keep reading for a step-by-step breakdown of everything you need to know!
If you’re feeling a little lost in the world of makeup—don’t worry, I’ve been there too. From picking the right foundation to achieving the perfect winged eyeliner, there’s a lot to learn, but I promise it’s easier than it seems! Let’s break it all down together.
10 Makeup Tips for Beginners You Need to Know
Before we dive into specific looks, let’s go over some must-know tips that will make your makeup journey smoother (literally!).
1. Know Your Skin Type
Your skin type affects how makeup sits on your face. If you have oily skin, opt for matte foundations like the L’Oréal Paris Infallible Pro-Matte Foundation (available on Amazon). If you have dry skin, a hydrating foundation like L’Oréal Paris True Match Lumi Healthy Luminous Makeup (available on Amazon) is a better fit.
Before diving into the world of makeup, the first step to achieving a flawless look is understanding your skin type. Your skin type affects everything—from the foundation you choose to how your makeup lasts throughout the day. Using the wrong products can lead to makeup that looks cakey, patchy, or fades too quickly. Let’s break it down so you can find the perfect match for your skin’s unique needs!
Oily Skin: Shine Control and Matte Perfection
If your skin tends to get shiny within a few hours of applying makeup, you likely have oily skin. The key to achieving a long-lasting, fresh look is oil control and mattifying products.
- Best Foundations: Opt for oil-free, matte foundations like L’Oréal Paris Infallible Pro-Matte Foundation (available on Amazon) or Maybelline Fit Me Matte + Poreless Foundation (available on Amazon). These will help absorb excess oil and keep your face looking shine-free all day.
- Primer Matters: A mattifying primer, such as e.l.f. Matte Putty Primer (available on Amazon) or Rimmel Stay Matte Primer (available on Amazon), will create a smooth base and help control oil production.
- Setting Powder: Lock your makeup in place with a translucent setting powder like Laura Mercier Translucent Loose Setting Powder (available on Amazon) or Coty Airspun Loose Face Powder (available on Amazon).
- Blotting Papers & Touch-Ups: Keep blotting papers like Clean & Clear Oil Absorbing Sheets (available on Amazon) on hand to dab away shine without disturbing your makeup.
Dry Skin: Hydration is Key
If your skin often feels tight, flaky, or dull, hydration should be your focus. Dry skin can make foundation cling to dry patches, so choosing moisturizing products is essential.
- Best Foundations: Go for a luminous, hydrating foundation like L’Oréal Paris True Match Lumi Healthy Luminous Makeup (available on Amazon) or IT Cosmetics Your Skin But Better CC+ Cream (available on Amazon) to keep your skin looking dewy and radiant.
- Primer for Smooth Application: A hydrating primer such as Too Faced Hangover Replenishing Face Primer (available on Amazon) or NYX Hydra Touch Primer (available on Amazon) will create a smooth, nourished base.
- Liquid & Cream Products: Stick to cream blushes and liquid highlighters like Rare Beauty Soft Pinch Liquid Blush (available on Amazon) or Charlotte Tilbury Beauty Light Wand (available on Amazon) to prevent makeup from looking dry or patchy.
- Setting Sprays for a Fresh Finish: Instead of powders, use a dewy setting spray like MAC Fix+ Spray (available on Amazon) or Morphe Continuous Setting Mist (available on Amazon) to set makeup without drying out your skin.
Combination Skin: The Best of Both Worlds
If you have combination skin, you may notice that some areas of your face (like your T-zone) are oily while others (like your cheeks) are dry. The key is to balance both needs.
- Best Foundations: A satin-finish foundation like NARS Natural Radiant Longwear Foundation (available on Amazon) or Estée Lauder Double Wear Stay-in-Place Makeup (available on Amazon) works well to maintain balance.
- Multi-Priming Technique: Use a mattifying primer on oily areas (like Benefit POREfessional Mattifying Primer (available on Amazon)) and a hydrating primer on dry spots (like Milk Hydro Grip Primer (available on Amazon)).
- Strategic Powdering: Apply powder only to your oily areas, using a product like Fenty Beauty Pro Filt’r Instant Retouch Setting Powder (available on Amazon).
Sensitive Skin: Gentle & Soothing Choices
If your skin is easily irritated or prone to redness, choosing fragrance-free and hypoallergenic products is key.
- Best Foundations: Opt for lightweight, skin-soothing foundations like bareMinerals Complexion Rescue Tinted Hydrating Gel Cream (available on Amazon) or Physicians Formula Organic Wear Silk Foundation Elixir (available on Amazon).
- Calming Primers: A primer infused with soothing ingredients like Tatcha The Silk Canvas Protective Primer (available on Amazon) or First Aid Beauty Coconut Skin Smoothie Priming Moisturizer (available on Amazon) can help reduce redness and irritation.
- Minimal Ingredient Products: Look for brands that focus on clean beauty, like Ilia, Tower 28, or Honest Beauty.
Final Tip: Always Prep Your Skin!
Regardless of your skin type, proper skincare is the foundation of great makeup. Cleanse, moisturize, and use sunscreen daily to ensure your skin stays healthy and ready for any makeup look. Choosing products that align with your skin type will make all the difference in how your makeup applies and lasts throughout the day.
2. And Your Colors
Just like certain clothing colors complement your skin tone, so do makeup shades.
Just like certain clothing colors can make your complexion glow or wash you out, makeup shades work the same way! Choosing the right hues for your foundation, blush, eyeshadow, and lipstick can enhance your natural beauty and make your features pop. The key is understanding your undertone and how it influences which colors suit you best. Let’s dive in and find your perfect shades!
Understanding Your Undertone
Your undertone is the subtle hue beneath the surface of your skin, and it plays a crucial role in which colors will complement you. Undertones generally fall into three categories:
- Cool Undertones: Skin has hints of pink, red, or blue. Veins on the wrist appear bluish, and silver jewelry tends to be more flattering.
- Warm Undertones: Skin has hints of yellow, gold, or peach. Veins on the wrist appear greenish, and gold jewelry tends to be more flattering.
- Neutral Undertones: A mix of both cool and warm tones, with veins appearing bluish-green. Both silver and gold jewelry are flattering.
Best Makeup Colors for Cool Undertones
If you have cool undertones, opt for makeup shades with blue or purple bases. Here are some great choices:
- Foundation: Look for shades labeled “porcelain,” “ivory,” or “cool beige.”
- Blush: Soft pinks, cool mauves, and berry tones like NARS Blush in Dolce Vita (available on Amazon) or Tarte Amazonian Clay Blush in Paaarty (available on Amazon).
- Eyeshadow: Cool-toned shades such as icy blues, silvers, cool browns, and purples. Try Urban Decay Naked2 Eyeshadow Palette (available on Amazon) for a versatile selection.
- Lipstick: Stick to blue-based reds, rosy pinks, and plum shades. Some great picks include MAC Ruby Woo (available on Amazon) and Charlotte Tilbury Pillow Talk Medium (available on Amazon).
Best Makeup Colors for Warm Undertones
Warm undertones shine with earthy, golden, and peach-based shades. These colors will bring out the natural warmth in your complexion:
- Foundation: Look for shades labeled “warm beige,” “golden,” or “honey.”
- Blush: Peachy tones, warm corals, and bronzy shades work beautifully. Try Milani Baked Blush in Luminoso (available on Amazon) or Fenty Beauty Cheeks Out Freestyle Cream Blush in Fuego Flush (available on Amazon).
- Eyeshadow: Go for warm browns, golds, oranges, and bronzes. The Huda Beauty Nude Obsessions Eyeshadow Palette in Medium (available on Amazon) is a great choice.
- Lipstick: Stick to warm reds, terracottas, peaches, and oranges. Some perfect options include Fenty Beauty Mattemoiselle Plush Matte Lipstick in Freckle Fiesta (available on Amazon) and Maybelline SuperStay Matte Ink in Heroine (available on Amazon).
Best Makeup Colors for Neutral Undertones
If you have a neutral undertone, you can pull off both cool and warm shades. Lucky you! Here’s how to balance both sides:
- Foundation: Look for shades labeled “neutral,” “natural beige,” or “buff.”
- Blush: Versatile shades like dusty rose, soft pinks, or peachy tones. Try Benefit Cosmetics Dandelion Blush (available on Amazon) or Clinique Cheek Pop in Ginger Pop (available on Amazon).
- Eyeshadow: You can experiment with both warm and cool shades. A great palette for versatility is Anastasia Beverly Hills Soft Glam Eyeshadow Palette (available on Amazon).
- Lipstick: Mauves, nude pinks, soft reds, and berry tones are perfect. Some great choices include YSL Rouge Volupté Shine in Nude Lavalliere (available on Amazon) and Revlon Super Lustrous Lipstick in Blushed (available on Amazon).
Final Tip: Experiment and Have Fun!
While knowing your undertone can guide you toward flattering shades, makeup is all about self-expression. Don’t be afraid to experiment with different colors and step outside of your comfort zone! With the right shades, you can enhance your natural beauty while showing off your unique style.
3. Stock Up on the Best Products
You don’t have to break the bank for great makeup! Some of the best drugstore finds include Maybelline Fit Me Concealer (available on Amazon), NYX Professional Makeup Butter Gloss (available on Amazon), and e.l.f. Camo CC Cream (available on Amazon).
You don’t have to splurge on high-end brands to build an amazing makeup collection! Some of the best beauty finds are actually available at the drugstore, offering quality products at budget-friendly prices. Whether you’re looking for foundation, concealer, or lip color, there are plenty of affordable gems that perform just as well as luxury alternatives. Let’s explore some of the top must-have makeup products and why they deserve a spot in your routine!
Best Drugstore Foundations
A great foundation sets the base for your entire makeup look, and there are plenty of affordable options that provide excellent coverage and finish:
- e.l.f. Camo CC Cream (available on Amazon) – This color-correcting cream offers buildable coverage with a natural finish and SPF protection.
- Maybelline Fit Me Matte + Poreless Foundation (available on Amazon) – Ideal for oily skin, this foundation blurs pores and controls shine.
- L’Oréal Paris Infallible 24HR Fresh Wear Foundation (available on Amazon) – A lightweight, long-wearing foundation that offers breathable full coverage.
Top Drugstore Concealers
The right concealer can brighten under-eyes, cover blemishes, and even double as a contour product! Some standout options include:
- Maybelline Fit Me Concealer (available on Amazon) – A lightweight, natural-looking concealer that blends seamlessly.
- NYX Professional Makeup HD Photogenic Concealer (available on Amazon) – Offers medium-to-full coverage with a creamy texture.
- e.l.f. Hydrating Camo Concealer (available on Amazon) – Provides full coverage with a satin finish that’s great for dry skin.
Best Drugstore Blushes & Bronzers
Adding some color and warmth to your face is easy with these budget-friendly blushes and bronzers:
- Milani Baked Blush in Luminoso (available on Amazon) – A cult-favorite peachy blush with a subtle shimmer for a natural glow.
- Physicians Formula Butter Bronzer (available on Amazon) – A smooth, blendable bronzer that gives a sun-kissed finish.
- Wet n Wild Color Icon Blush (available on Amazon) – Highly pigmented and available in a range of flattering shades.
Affordable Eyeshadow Palettes
Great eyeshadow doesn’t have to cost a fortune! These palettes offer amazing color payoff and blendability:
- NYX Ultimate Shadow Palette (available on Amazon) – Features a variety of shades in matte and shimmer finishes.
- Maybelline The Nudes Eyeshadow Palette (available on Amazon) – A perfect selection of neutral tones for everyday wear.
- e.l.f. Mad for Matte Eyeshadow Palette (available on Amazon) – Offers all-matte shades for creating classic eye looks.
Best Drugstore Lip Products
Whether you love a glossy, matte, or satin finish, these lip products deliver high-end results without the hefty price tag:
- NYX Professional Makeup Butter Gloss (available on Amazon) – A smooth, non-sticky gloss available in a variety of shades.
- Maybelline SuperStay Matte Ink Liquid Lipstick (available on Amazon) – Long-lasting, highly pigmented liquid lipstick that stays put.
- Revlon Super Lustrous Lipstick (available on Amazon) – A classic lipstick with a creamy, moisturizing formula.
Must-Have Drugstore Mascaras
No makeup routine is complete without a good mascara to enhance your lashes! Some of the best options include:
- L’Oréal Paris Lash Paradise Mascara (available on Amazon) – Adds volume and length with a feathery-soft finish.
- Maybelline Lash Sensational Mascara (available on Amazon) – Separates and lifts lashes for a full-fan effect.
- CoverGirl Lash Blast Volume Mascara (available on Amazon) – Boosts lash volume without clumping.
Final Thoughts: Quality on a Budget
The beauty industry offers a vast range of drugstore products that rival high-end alternatives in quality and performance. With these affordable makeup staples, you can create stunning looks without emptying your wallet. So, don’t be afraid to explore and experiment—your perfect makeup routine doesn’t have to come with a luxury price tag!
4. And the Right Tools
Blending is key! Invest in a set of quality brushes like the Real Techniques Everyday Essentials Brush Set (available on Amazon) and sponges like the Beautyblender Original Makeup Sponge (available on Amazon) for a flawless finish.
Makeup application is an art, and just like any artist, you need the right tools to achieve the best results. Using high-quality brushes and sponges ensures seamless blending, better product application, and an overall polished look. Here’s a breakdown of the essential tools every beginner should have and how to use them effectively.
Must-Have Makeup Brushes
Investing in a reliable brush set can make all the difference in your makeup routine. Here are some must-have brushes and their uses:
- Foundation Brush – A dense, flat brush like the Real Techniques Expert Face Brush (available on Amazon) helps evenly distribute liquid and cream foundations for a smooth finish.
- Concealer Brush – A small, tapered brush such as the e.l.f. Flawless Concealer Brush (available on Amazon) allows for precise application under the eyes and around blemishes.
- Powder Brush – A fluffy brush like the Real Techniques Powder Brush (available on Amazon) is perfect for setting your makeup with loose or pressed powder.
- Blush Brush – The Wet n Wild Blush Brush (available on Amazon) is soft, angled, and ideal for applying blush to the apples of your cheeks.
- Bronzer & Contour Brush – A sculpting brush like the EcoTools Precision Blush Brush (available on Amazon) helps apply bronzer or contour with precision.
- Eyeshadow Blending Brush – A fluffy blending brush such as the Morphe M433 (available on Amazon) is crucial for diffusing eyeshadow seamlessly.
- Eyebrow Brush & Spoolie – A dual-ended brush like the Anastasia Beverly Hills Brush 12 (available on Amazon) allows you to apply brow product and groom your brows for a natural finish.
The Power of Sponges
Makeup sponges are an absolute game-changer when it comes to achieving a flawless, airbrushed finish. Here’s why you need them:
- Beautyblender Original Makeup Sponge (available on Amazon) – This iconic sponge is perfect for blending foundation, concealer, and cream blush. Use it damp for a dewy look or dry for more coverage.
- Real Techniques Miracle Complexion Sponge (available on Amazon) – A budget-friendly alternative that works just as well for applying liquid products.
- Juno & Co. Microfiber Velvet Sponge (available on Amazon) – Ideal for applying both liquid and powder products while minimizing product absorption.
Additional Tools for Precision & Perfection
Apart from brushes and sponges, here are some other essential tools that can level up your makeup game:
- Eyelash Curler – A good curler, like the Shu Uemura Eyelash Curler (available on Amazon), lifts and curls lashes for a wide-eyed effect.
- Tweezers – Keep your brows in shape with precise tweezers such as the Tweezerman Slant Tweezers (available on Amazon).
- Makeup Brush Cleaner – To keep your tools hygienic and long-lasting, use the Cinema Secrets Makeup Brush Cleaner (available on Amazon) for quick and effective cleaning.
Final Thoughts: Investing in the Right Tools
While quality makeup products are important, the right tools can make or break your look. By using well-designed brushes and sponges, you can elevate your application skills and achieve a flawless, professional-looking finish. Start with a basic set and gradually expand your collection based on your needs!
5. Keep Your Brushes Clean
Dirty brushes can lead to breakouts and uneven application. I use the EcoTools Makeup Brush + Sponge Shampoo (available on Amazon) to keep them fresh.
Cleaning your makeup brushes regularly is essential for maintaining healthy skin and ensuring smooth makeup application. Dirty brushes can harbor bacteria, leading to breakouts, irritation, and uneven product application. Here’s how to keep your brushes fresh and in top shape.
Why Cleaning Your Brushes Matters
- Prevents Breakouts & Irritation – Brushes accumulate oil, dead skin cells, and bacteria, which can transfer to your skin and cause breakouts.
- Ensures Smooth Makeup Application – Dirty brushes can cause streaky foundation, patchy eyeshadow, and muddy blending.
- Extends the Life of Your Brushes – Proper maintenance keeps bristles soft and prevents shedding, meaning your brushes last longer.
How Often Should You Clean Your Brushes?
- Foundation & Concealer Brushes – At least once a week since they handle liquid and cream products that build up quickly.
- Eyeshadow Brushes – Every two weeks, but more frequently if using multiple colors.
- Powder Brushes – Once a month, as powders don’t breed bacteria as quickly as liquids.
- Sponges & Beauty Blenders – After every use, as they absorb a lot of product and moisture, making them a breeding ground for bacteria.
The Best Brush Cleaning Products
To keep your brushes in the best condition, use a gentle but effective cleanser. Here are some great options:
- EcoTools Makeup Brush + Sponge Shampoo (available on Amazon) – A budget-friendly, plant-based cleanser that removes dirt and buildup without harsh chemicals.
- Cinema Secrets Makeup Brush Cleaner (available on Amazon) – A professional-grade cleaner that dissolves product instantly and dries quickly.
- Beautyblender Liquid BlenderCleanser (available on Amazon) – Specifically designed for sponges and beauty blenders to remove stubborn foundation and oils.
Step-by-Step Guide to Cleaning Your Brushes
- Rinse – Hold the brush bristles under lukewarm running water, avoiding the base of the brush to prevent loosening the glue.
- Lather – Pour a small amount of brush cleanser into your palm or a cleaning mat and gently swirl the brush bristles.
- Rinse Again – Thoroughly rinse until no soap or makeup residue remains.
- Squeeze & Reshape – Gently squeeze out excess water and reshape the bristles to maintain their original form.
- Dry Properly – Lay brushes flat on a clean towel with the bristles hanging off the edge of a counter to dry overnight.
Quick Cleaning Tip for Daily Maintenance
If you don’t have time for a deep clean, use a quick-drying spray cleanser like the Sephora Daily Brush Cleaner (available on Amazon) or MAC Brush Cleanser (available on Amazon). Simply spray the product onto a tissue and swipe your brush back and forth to remove surface buildup.
Final Thoughts: A Clean Brush is a Happy Brush!
Regularly cleaning your brushes not only protects your skin but also ensures your makeup looks flawless every time. Make brush cleaning a part of your beauty routine, and you’ll notice the difference in both your complexion and your makeup’s performance!
6. Start with Makeup Primer
A primer smooths your skin and makes your makeup last longer. Try the e.l.f. Power Grip Primer (available on Amazon) or Smashbox Photo Finish Foundation Primer (available on Amazon).
A good makeup primer is the secret to flawless, long-lasting makeup. It creates a smooth base, minimizes pores, and ensures your foundation stays put throughout the day. Whether you have dry, oily, or combination skin, choosing the right primer can make a world of difference.
Why You Need a Primer
- Smooths the Skin – Primer fills in fine lines and pores, creating a silky canvas for your makeup.
- Increases Makeup Longevity – Helps foundation and other products adhere better, preventing fading and creasing.
- Controls Shine or Adds Hydration – Depending on the formula, primers can mattify oily skin or provide moisture for dry skin.
- Enhances Makeup Application – Makes blending easier and prevents foundation from settling into imperfections.
Choosing the Right Primer for Your Skin Type
Picking the right primer depends on your skin’s needs. Here are some top recommendations:
- For Oily Skin – Try a mattifying primer like Smashbox Photo Finish Foundation Primer or Rimmel Stay Matte Primer (available on Amazon) to control shine and reduce excess oil.
- For Dry Skin – A hydrating primer such as e.l.f. Power Grip Primer (available on Amazon) or Too Faced Hangover Replenishing Face Primer (available on Amazon) helps keep your skin moisturized and prevents flaky makeup.
- For Combination Skin – Opt for a balancing primer like Tatcha The Silk Canvas Primer (available on Amazon), which smooths without making your skin too oily or too dry.
- For Large Pores – Use a pore-filling primer such as Benefit POREfessional Face Primer (available on Amazon), which blurs imperfections and gives a flawless finish.
How to Apply Primer for Best Results
Follow these steps to ensure your primer does its job effectively:
- Start with Clean Skin – Wash your face and apply your regular skincare products, including moisturizer and SPF.
- Use a Pea-Sized Amount – A little goes a long way; apply a small amount to your fingertips.
- Apply Evenly – Gently blend the primer over your entire face, focusing on areas where makeup tends to wear off quickly (like the T-zone).
- Let It Set – Wait about 30 seconds before applying foundation to allow the primer to fully absorb.
Bonus Tip: Layering Primers
If you have multiple skin concerns, don’t be afraid to use more than one primer! For example, apply a mattifying primer to your T-zone and a hydrating primer to your cheeks.
Final Thoughts: The Power of a Good Primer
Starting with a great primer can make all the difference in your makeup routine. Whether you want a dewy glow or an all-day matte look, the right primer sets the stage for a flawless face. Choose one that fits your skin type, apply it correctly, and enjoy a makeup look that lasts all day!
7. And Finish with Setting Spray
Lock in your look with L’Oréal Paris Infallible Pro-Spray (available on Amazon) and Set Make-Up Oil-Free Setting Spray (available on Amazon).
A good setting spray is the final touch to lock in your makeup and keep it looking fresh all day. Whether you’re going for a natural glow or a long-wearing matte finish, setting spray ensures your look stays put without smudging, fading, or creasing.
Why Use a Setting Spray?
- Increases Makeup Longevity – Keeps foundation, concealer, and powder in place for hours.
- Controls Shine or Adds Hydration – Depending on the formula, setting sprays can mattify oily skin or refresh dry skin.
- Prevents Smudging & Transfer – Helps keep your makeup intact even in humidity or heat.
- Gives a Natural Finish – Reduces cakiness and blends makeup seamlessly.
Choosing the Right Setting Spray for Your Skin Type
Picking the right setting spray ensures your makeup lasts longer and complements your skin’s needs.
- For Oily Skin – Opt for a mattifying setting spray like Urban Decay All Nighter Long-Lasting Makeup Setting Spray (available on Amazon) to control shine and keep your makeup intact for hours.
- For Dry Skin – A hydrating spray such as MAC Prep + Prime Fix+ (available on Amazon) or Tatcha Luminous Dewy Skin Mist (available on Amazon) will keep your skin refreshed and glowing.
- For Combination Skin – A versatile option like Morphe Continuous Setting Mist (available on Amazon) balances hydration and oil control.
- For Long-Lasting Wear – The L’Oréal Paris Infallible Pro-Spray and Set Make-Up Oil-Free Setting Spray (available on Amazon) is a great choice to ensure a fresh look all day long.
How to Apply Setting Spray for Best Results
- Shake Well – Always shake the bottle before use to mix the ingredients properly.
- Hold at a Distance – Keep the spray about 8-12 inches from your face.
- Spray in an “X” & “T” Motion – This ensures even coverage across your entire face.
- Let It Dry Naturally – Avoid touching your face until the spray has fully set.
Pro Tip: Layering for Extra Hold
For ultra-long wear, apply a light layer of setting spray between your foundation and powder application, then finish with another spritz at the end.
Final Thoughts: Lock in Your Look!
A setting spray is the ultimate finishing touch to keep your makeup looking flawless from morning to night. Choose the right one for your skin type, apply it correctly, and enjoy all-day confidence in your look!
8. Don’t Skip Your Brows
Eyebrows frame your face! Use the Anastasia Beverly Hills Brow Wiz (available on Amazon) for precise definition or the NYX Tinted Brow Mascara (available on Amazon) for a natural look.
Your eyebrows frame your face and play a major role in enhancing your overall look. Whether you love a bold, structured brow or a soft, natural arch, giving your brows the attention they deserve can transform your makeup game.
Why Your Brows Matter
- Defines Your Face – Well-groomed brows enhance your facial structure and balance your features.
- Completes Your Makeup Look – Even the simplest makeup look feels more polished with filled-in brows.
- Adds Expression – Brows play a key role in conveying emotions and giving your face character.
Choosing the Right Brow Products
Selecting the right products depends on your desired look and your natural brow shape.
- For Precise Definition – Try the Anastasia Beverly Hills Brow Wiz (available on Amazon) for ultra-fine strokes that mimic natural hair.
- For a Soft, Natural Look – Use the NYX Tinted Brow Mascara (available on Amazon) to lightly tint and shape your brows while keeping them soft and full.
- For a Fluffy, Laminated Effect – The Benefit 24-HR Brow Setter (available on Amazon) keeps brows in place while giving them a feathery, lifted look.
- For Filling Sparse Areas – The L’Oréal Paris Brow Stylist Definer (available on Amazon) is great for adding fullness without looking overdone.
How to Shape and Fill Your Brows
- Brush Your Brows – Use a spoolie to brush hairs upward and reveal sparse areas.
- Outline Your Shape – Lightly trace your natural brow shape with a pencil or powder.
- Fill in Gaps – Use hair-like strokes for a natural look, focusing on sparse areas.
- Blend and Set – Brush through with a spoolie to soften harsh lines and finish with a brow gel for all-day hold.
Pro Tip: Matching Your Brow Shade
Choose a brow product that matches your natural hair color or is one shade lighter for a softer, more natural effect. If your brows are very sparse, a mix of pencil and tinted gel can add both definition and dimension.
Final Thoughts: The Power of Brows
Whether you prefer bold or barely-there brows, taking a few extra minutes to shape and define them will elevate your makeup look. Find the right products, follow a simple routine, and let your brows bring out your best features!
9. Stamps and Stencils Are Your Friends
Struggling with eyeliner? Use The Quick Flick Eyeliner Stamp (available on Amazon) or Kaja Wink Stamp Wing Eyeliner Stamp & Pen (available on Amazon) for perfect wings.
Perfecting eyeliner, especially a winged look, can be one of the most frustrating parts of a makeup routine. If you’ve ever spent ages trying to get both wings even, only to end up wiping it all off in frustration, you’re not alone! That’s where eyeliner stamps and stencils come in—they take the guesswork out of achieving sharp, symmetrical wings every time.
Why Use Eyeliner Stamps and Stencils?
- Saves Time – No more spending 10+ minutes trying to match both wings.
- Foolproof Symmetry – Ensures even, precise wings without needing a steady hand.
- Beginner-Friendly – Makes achieving a professional look easy, even if you’re new to makeup.
- Reduces Mistakes – Less chance of smudging, uneven lines, or needing to start over.
Best Eyeliner Stamps and Stencils
If you’re ready to simplify your winged eyeliner routine, these products are must-haves:
- The Quick Flick Eyeliner Stamp (available on Amazon) – A dual-ended pen with a pre-shaped wing stamp on one side and a precision liner on the other for easy application.
- Kaja Wink Stamp Wing Eyeliner Stamp & Pen (available on Amazon) – This set includes a wing stamp and a felt-tip eyeliner for defining your lash line effortlessly.
- iMethod Eyeliner Stamp & Stencil Kit (available on Amazon) – A great choice if you want versatility, as it comes with different wing sizes for customizable looks.
- L’Oréal Paris Infallible Flash Cat Eye Waterproof Brush Tip Liquid Eyeliner (available on Amazon) – Features a built-in stencil for achieving sharp, clean wings with ease.
How to Use Eyeliner Stamps and Stencils
- Align the Stamp or Stencil – Place it at the outer corner of your eye where you want the wing to be.
- Press or Fill in the Shape – If using a stamp, press it onto your skin. If using a stencil, fill it in with your preferred liquid or gel liner.
- Connect to Your Lash Line – Use the liner pen to connect the wing to the rest of your eyeliner for a seamless look.
- Let It Dry – Allow a few seconds for the liner to dry completely to prevent smudging.
Pro Tip: Customize Your Wing
If you want a more dramatic look, go for a larger stamp or stencil. For a subtle wing, lightly press the stamp for a softer effect. You can also layer a bit of eyeshadow over your liner to soften the edges for a smokier finish.
Final Thoughts: Effortless Wings Every Time
Winged eyeliner doesn’t have to be a struggle! With the right stamp or stencil, you can achieve flawless, symmetrical wings in seconds. Whether you’re a beginner or just want to speed up your routine, these tools are game-changers in the world of eye makeup.
10. Use Lash Primer
Boost your lashes with L’Oréal Paris Voluminous Lash Primer (available on Amazon) before applying mascara.
If you want longer, fuller, and more dramatic lashes, lash primer is your secret weapon. Many people skip this step, but using a lash primer before applying mascara can make a huge difference in the final look and wear of your lashes. Whether you have naturally short lashes or just want that extra boost, lash primer is a must-have in your makeup routine.
Why Use a Lash Primer?
- Enhances Volume and Length – Lash primers coat each lash, adding thickness and length before you even apply mascara.
- Improves Mascara Performance – Helps mascara adhere better and glide on smoothly without clumping.
- Prolongs Wear – Creates a base that prevents flaking and smudging, keeping your lashes looking fresh all day.
- Nourishes and Protects – Many lash primers contain conditioning ingredients that strengthen lashes over time.
Best Lash Primers to Try
If you’re ready to take your lash game to the next level, these top-rated lash primers will do the trick:
- L’Oréal Paris Voluminous Lash Primer (available on Amazon) – A budget-friendly option that enhances volume and preps lashes for mascara.
- Lancôme Cils Booster XL Super-Enhancing Mascara Base (available on Amazon) – Infused with microfibers, this primer builds impressive length and thickness.
- Tarte Opening Act Lash Primer (available on Amazon) – Contains conditioning ingredients like jojoba and carnauba wax to nourish lashes while boosting volume.
- Dior Diorshow Maximizer 3D Triple Volume Plumping Lash Primer (available on Amazon) – A high-end choice that delivers dramatic results with a serum-infused formula.
How to Apply Lash Primer for Best Results
- Curl Your Lashes First – Using an eyelash curler before applying primer helps lift and open up your eyes.
- Apply a Thin Coat of Primer – Start from the base of your lashes and wiggle the wand upward to coat each lash evenly.
- Wait a Few Seconds – Let the primer dry slightly before applying mascara. This ensures it doesn’t mix with the mascara formula.
- Follow with Your Favorite Mascara – Apply your regular mascara on top of the primed lashes for a bold, enhanced look.
- Build for Extra Drama – For even more volume and length, apply a second coat of mascara while the first is still slightly tacky.
Pro Tip: Customize Your Look
For a natural, feathery look, use a light coat of primer with one coat of mascara. If you’re going for a full-glam effect, apply an extra layer of both primer and mascara, focusing on the outer lashes for a lifted cat-eye effect.
Final Thoughts: Elevate Your Lash Game
Using a lash primer might seem like an extra step, but once you see the difference it makes, you’ll never skip it again. Whether you want natural-looking definition or bold, dramatic lashes, a good lash primer will help you achieve your desired look effortlessly.
9 Makeup Tutorials for Beginners
Now that you know the basics, let’s put them to use!
1. Beginner’s Eyeshadow
Master blending with The Easy Eyeshadow Tutorial for Beginners (available on Amazon) using the Urban Decay Naked3 Eyeshadow Palette (available on Amazon).
Learning how to apply eyeshadow can seem intimidating, but with the right techniques and tools, you can create beautiful, blended looks effortlessly. The key is to start with simple techniques and build confidence as you go. Here’s everything you need to know to get started with eyeshadow application like a pro.
Choosing the Right Eyeshadow Palette
Your eyeshadow journey begins with selecting the right palette. Neutral tones are best for beginners because they are versatile and easy to blend. A great option is the Urban Decay Naked3 Eyeshadow Palette (available on Amazon), which features a range of soft pinks, taupes, and bronzes—perfect for everyday wear.
Essential Eyeshadow Brushes
To achieve a flawless application, having the right brushes is crucial. Here are three must-have brushes for beginners:
- Blending Brush – Helps to soften harsh lines and create seamless transitions between shades.
- Flat Shader Brush – Perfect for packing color onto the lid.
- Angled Brush – Useful for adding definition to the crease or lining the eyes with darker shadows.
Step-by-Step Eyeshadow Application for Beginners
Follow these simple steps to create an easy, everyday eyeshadow look:
- Prime Your Lids – Apply an eyeshadow primer to ensure your shadow stays put all day and enhances the pigment.
- Apply a Base Shade – Use a light, neutral shade all over your eyelid as a base to even out skin tone.
- Define the Crease – Choose a slightly darker shade and blend it into your crease using a windshield wiper motion.
- Add Depth – Apply a deeper shade to the outer corner of your eye to create dimension.
- Highlight the Brow Bone & Inner Corner – Use a shimmery or matte light shade to brighten the inner corners and under the brow bone.
- Blend, Blend, Blend – Use a clean blending brush to soften any harsh lines for a seamless transition between colors.
- Finish with Mascara – Complete the look with a few coats of mascara to open up your eyes.
Common Eyeshadow Mistakes to Avoid
- Skipping Primer – Without primer, your eyeshadow may crease or fade quickly.
- Using the Wrong Brush – A good brush makes blending much easier.
- Applying Too Much Product at Once – Always start with a small amount and build up the intensity.
- Not Blending Enough – Harsh lines can make your eyeshadow look unpolished.
Final Thoughts: Practice Makes Perfect
Eyeshadow application is an art that gets better with practice. Start with simple, neutral looks and experiment as you grow more confident. With the right products and techniques, you’ll be blending like a pro in no time!
2. Monochromatic Makeup
For a cohesive look, try Maybelline Cheek Heat Gel-Cream Blush (available on Amazon), NYX Soft Matte Lip Cream (available on Amazon), and ColourPop Super Shock Shadow (available on Amazon) in similar shades.
Monochromatic makeup is an easy yet stunning way to achieve a polished, put-together look. By using the same color family on your eyes, cheeks, and lips, you create a seamless and harmonious effect that enhances your natural beauty. Whether you prefer soft neutrals, romantic pinks, or bold reds, this technique is universally flattering and beginner-friendly.
Choosing Your Monochromatic Shade
The key to monochromatic makeup is picking a shade that complements your skin tone and suits your personal style. Here are some popular options:
- Soft Pinks & Peaches – Ideal for a fresh, youthful glow.
- Warm Nudes & Browns – Perfect for a sophisticated everyday look.
- Bold Reds & Burgundies – Great for making a dramatic statement.
- Coral & Orange Tones – A fun and vibrant choice for summer.
Must-Have Products for Monochromatic Makeup
To achieve a cohesive monochromatic look, try using the following products in a similar shade:
- Blush: Maybelline Cheek Heat Gel-Cream Blush (available on Amazon) – A lightweight, blendable cream blush that gives a natural flush.
- Eyeshadow: ColourPop Super Shock Shadow (available on Amazon) – A creamy, long-wearing shadow available in various monochromatic hues.
- Lip Color: NYX Soft Matte Lip Cream (available on Amazon) – A velvety, pigmented lip cream that completes the monochromatic effect.
Step-by-Step Monochromatic Makeup Application
- Prep Your Skin – Start with a hydrated base and apply your usual foundation and concealer.
- Apply Your Blush – Dab the Maybelline Cheek Heat Gel-Cream Blush (available on Amazon) onto the apples of your cheeks and blend upwards for a lifted effect.
- Define Your Eyes – Sweep the ColourPop Super Shock Shadow (available on Amazon) across your lids and blend out the edges.
- Enhance Your Lips – Finish with a swipe of NYX Soft Matte Lip Cream (available on Amazon) in a matching shade to tie the look together.
- Blend for a Seamless Finish – Use a damp sponge or a fluffy brush to ensure all the colors transition smoothly.
Tips for a Flawless Monochromatic Look
- Balance is Key – Keep the intensity of your shades even across eyes, cheeks, and lips.
- Mix Textures – Combine matte, shimmer, and satin finishes for added dimension.
- Adjust Intensity – For a bold look, apply more product; for a subtle effect, sheer it out.
- Set Your Makeup – Use a setting spray to lock in your monochromatic masterpiece.
Why Monochromatic Makeup Works for Everyone
This technique is incredibly versatile and can be customized to fit any occasion, from a casual day out to a glamorous evening event. By sticking to one color family, you create an effortlessly chic and modern look that requires minimal effort but delivers maximum impact. Try experimenting with different shades and textures to find the perfect monochromatic look that makes you feel your most beautiful!
3. Matte Lip Gloss
Get the best of both worlds with the Fenty Beauty Gloss Bomb Cream Color Drip Lip Cream (available on Amazon).
Matte lip gloss is the perfect combination of a velvety matte finish and the comfortable, non-drying feel of a gloss. It provides long-lasting color without the heaviness of a traditional matte lipstick, making it a go-to option for an everyday polished look.
Why Choose Matte Lip Gloss?
- Comfortable Wear: Unlike traditional matte lipsticks, matte lip glosses keep lips soft and hydrated.
- Long-Lasting Formula: These glosses provide extended wear while minimizing the need for touch-ups.
- Lightweight Feel: They offer full color without feeling thick or heavy on the lips.
- Minimal Transfer: Many matte lip glosses have a transfer-resistant formula, keeping your color intact longer.
Must-Have Product: Fenty Beauty Gloss Bomb Cream Color Drip Lip Cream
One of the best matte lip glosses available is the Fenty Beauty Gloss Bomb Cream Color Drip Lip Cream (available on Amazon). This product delivers rich, creamy color with a soft matte finish, ensuring your lips stay luscious without excessive shine.
How to Apply Matte Lip Gloss for a Flawless Finish
- Exfoliate Your Lips – Use a gentle lip scrub to remove any dry skin and create a smooth base.
- Moisturize – Apply a lightweight lip balm to keep lips soft but ensure it’s absorbed before applying color.
- Use a Lip Liner – Define your lips with a matching or nude lip liner to prevent feathering.
- Apply the Gloss – Use the applicator to evenly distribute the product, starting from the center and blending outward.
- Blot if Necessary – If you prefer a more muted effect, gently blot your lips with a tissue.
Pro Tips for the Perfect Matte Lip Look
- Choose the Right Shade – Pick a shade that complements your skin tone for a flattering look.
- Layer for Intensity – Apply a second coat for a bolder lip, or blend with a finger for a softer touch.
- Pair with Minimal Eye Makeup – A bold matte lip pairs beautifully with understated eye makeup for balance.
- Set with Powder – Lightly dust translucent powder over your lips to increase longevity.
Why You’ll Love Matte Lip Gloss
Matte lip gloss offers a stylish and modern finish that’s perfect for any occasion. Whether you’re heading to work, a casual brunch, or a glamorous night out, it’s a versatile choice that keeps your lips looking fresh and fabulous. Give the Fenty Beauty Gloss Bomb Cream Color Drip Lip Cream (available on Amazon) a try and experience the best of both matte and gloss in one luxurious product!
4. High Cheekbones
Sculpt your face using the Fenty Beauty Match Stix Contour Skinstick (available on Amazon).
High cheekbones are often associated with a lifted, sculpted look that enhances facial symmetry and adds definition. Even if you weren’t naturally born with prominent cheekbones, the right makeup techniques can help you achieve a beautifully chiseled appearance.
Why High Cheekbones Matter
- Defines Facial Structure: A well-contoured cheekbone can create the illusion of a more structured and balanced face.
- Lifts the Face: Proper contouring can give your face a lifted effect, making your features appear more youthful.
- Complements Various Makeup Looks: Whether you’re going for a natural or glam aesthetic, sculpted cheekbones add a polished touch.
Must-Have Product: Fenty Beauty Match Stix Contour Skinstick
For seamless contouring, the Fenty Beauty Match Stix Contour Skinstick (available on Amazon) is a game-changer. It offers a creamy, blendable formula that glides onto the skin effortlessly, allowing you to sculpt your cheekbones with precision.
Step-by-Step Guide to Sculpting High Cheekbones
- Find Your Cheekbone Line – Lightly suck in your cheeks to locate your natural bone structure.
- Apply Contour – Swipe the contour stick just below your cheekbones, starting from the ear and blending towards the middle of your face.
- Blend Thoroughly – Use a damp makeup sponge or contour brush to blend the product seamlessly into your skin.
- Highlight for Extra Lift – Apply a highlighter, such as Fenty Beauty Killawatt Freestyle Highlighter (available on Amazon), on the highest points of your cheekbones for an extra pop.
- Set with Translucent Powder – Lightly dust translucent powder to ensure your contour stays put throughout the day.
Pro Tips for the Perfect Sculpt
- Choose the Right Shade – Select a contour shade that is one to two shades darker than your natural skin tone for a natural-looking shadow effect.
- Use a Light Hand – Build up the contour gradually to avoid harsh lines.
- Blend Upward – Always blend your contour upwards to create a lifted effect rather than dragging it downward.
- Pair with Blush – A soft blush, like the Rare Beauty Soft Pinch Liquid Blush (available on Amazon), will add warmth and a healthy glow to your sculpted look.
Why You’ll Love Contouring Your Cheekbones
Enhancing your cheekbones with contour is an easy way to elevate your makeup routine and add an instant touch of sophistication. Whether you’re aiming for a subtle definition or full glam, the Fenty Beauty Match Stix Contour Skinstick (available on Amazon) makes achieving high cheekbones effortless and stunning!
5. Colored Mascara
Try L’Oréal Paris Voluminous in Cobalt Blue, Deep Burgundy, or Deep Green (available on Amazon) for a bold statement.
Colored mascara is a fun and easy way to elevate your eye makeup, adding a pop of color that enhances your natural eye shade and brings a unique flair to your look. Whether you’re experimenting with a bold statement or a subtle enhancement, colored mascara can take your makeup game to the next level.
Why Try Colored Mascara?
- Enhances Eye Color: Different hues can make your natural eye color stand out more vibrantly.
- Adds a Playful Twist: It’s a great way to step outside of your makeup comfort zone without going overboard.
- Versatile for Different Occasions: You can go subtle for everyday wear or dramatic for a night out.
- Complements Various Makeup Looks: Whether paired with neutral tones or colorful eyeshadows, colored mascara can elevate any style.
Best Colored Mascaras to Try
For bold and beautiful lashes, consider these shades from L’Oréal Paris Voluminous Mascara (available on Amazon):
- Cobalt Blue: Makes brown eyes pop and enhances blue eyes with a cool-toned contrast.
- Deep Burgundy: Soft yet striking, this shade is perfect for green and hazel eyes, adding warmth and depth.
- Deep Green: Ideal for brown and hazel eyes, green mascara offers an earthy, intriguing effect.
How to Apply Colored Mascara Like a Pro
- Start with a Lash Primer – Using a primer like the L’Oréal Paris Voluminous Lash Primer (available on Amazon) ensures the colored mascara adheres well and looks more vibrant.
- Wiggle the Wand – Apply the mascara from root to tip in a zigzag motion to fully coat the lashes.
- Layer for Intensity – One coat gives a subtle tint, while multiple layers enhance the color payoff.
- Pair with Neutral Eyeshadow – To let the mascara shine, opt for soft, neutral eyeshadows or a light shimmer.
- Use Black Mascara as a Base – For extra depth, apply black mascara first and layer colored mascara on top for a striking contrast.
Pro Tips for Rocking Colored Mascara
- Pair with Complementary Eyeliner: A matching or coordinating eyeliner can make the color stand out even more.
- Balance the Look: If you go bold on the lashes, keep the rest of your makeup minimal for a chic, effortless style.
- Experiment with Lower Lashes: Applying colored mascara only to the lower lashes can add a subtle, unexpected twist.
Why You’ll Love It
Colored mascara is the perfect way to play with color without committing to dramatic eyeshadows or liners. Whether you want a striking, fashion-forward look or just a fun way to brighten up your daily routine, L’Oréal Paris Voluminous Mascara (available on Amazon) in Cobalt Blue, Deep Burgundy, or Deep Green is a must-try addition to your beauty arsenal!
6. White Eyeshadow
Brighten your eyes with L’Oréal Paris Brilliant Eyes Shimmer Liquid Eye Shadow Makeup in String of Pearls (available on Amazon).
White eyeshadow is a versatile and underrated makeup product that can instantly brighten your eyes, add dimension to your look, and enhance the vibrancy of other colors. Whether you’re aiming for a bold, futuristic aesthetic or a soft, ethereal glow, incorporating white eyeshadow into your routine can make a world of difference.
Why Use White Eyeshadow?
- Brightens the Eyes: White eyeshadow creates an instant lifting effect, making the eyes appear larger and more awake.
- Enhances Other Colors: When used as a base, white eyeshadow helps intensify the pigments of other shades applied on top.
- Creates a Highlighting Effect: Perfect for the inner corners of the eyes, brow bone, or even the center of the lid for added dimension.
- Versatile for Different Looks: Works for everything from a minimalist, fresh-faced look to a dramatic, editorial style.
Best White Eyeshadow to Try
For a luminous and long-lasting finish, try the L’Oréal Paris Brilliant Eyes Shimmer Liquid Eye Shadow Makeup in String of Pearls (available on Amazon). This liquid formula delivers high-impact shimmer with a smooth, crease-resistant finish.
How to Use White Eyeshadow in Your Makeup Routine
- As an Eyeshadow Base – Apply a sheer layer of white eyeshadow before other shades to make the colors pop.
- Inner Corner Highlight – Dab a small amount on the inner corners of the eyes to create a brightening effect.
- Brow Bone Lift – Blend under the arch of your brows to subtly lift and define your eye area.
- All-Over Lid Glow – Sweep across the entire lid for an angelic, radiant look.
- Lower Waterline Trick – Use a white eyeliner or eyeshadow on the lower waterline to make your eyes look bigger and more awake.
Tips for Rocking White Eyeshadow
- Pair with Soft, Neutral Tones: To keep the look fresh and natural, blend white shadow with soft browns, taupes, or pinks.
- Use a Light Hand: Too much white can look stark—start with a little and build up as needed.
- Experiment with Different Finishes: Matte white eyeshadow offers a bold, editorial look, while shimmer and metallic finishes add a dreamy glow.
- Blend, Blend, Blend: Avoid harsh lines by blending white eyeshadow seamlessly into the rest of your eye makeup.
Why You’ll Love It
White eyeshadow is a game-changer in any makeup collection. Whether used as a brightening highlight, an eyeshadow base, or a statement lid color, it adds versatility and dimension to any look. Try L’Oréal Paris Brilliant Eyes Shimmer Liquid Eye Shadow in String of Pearls (available on Amazon) for a dazzling, long-lasting finish that enhances your beauty effortlessly.
7. Orange Lipstick
Make a statement with MAC Matte Lipstick in Lady Danger (available on Amazon).
Orange lipstick is a striking and playful way to add vibrancy to your makeup look. Whether you opt for a bold, fiery orange or a soft, peachy shade, this color is perfect for making a statement.
Finding the Right Shade of Orange
Not all orange lipsticks are created equal! The right shade depends on your skin tone and undertone:
- Fair Skin: Coral and peachy oranges work best, as they provide a soft yet lively contrast.
- Medium Skin: Burnt orange and warm tangerine shades complement golden undertones beautifully.
- Deep Skin: Bold, rich oranges like MAC Matte Lipstick in Lady Danger pop against deeper complexions.
How to Apply Orange Lipstick Flawlessly
To ensure your orange lipstick looks its best, follow these steps:
- Exfoliate Your Lips: Use a lip scrub to remove any dryness or flakes.
- Hydrate with a Balm: Apply a light lip balm to keep your lips moisturized.
- Use a Lip Liner: Outline your lips with a matching orange or nude liner to prevent feathering.
- Apply the Lipstick: Swipe on the MAC Matte Lipstick in Lady Danger (available on Amazon) for a bold, velvety finish.
- Blot and Set: Blot with a tissue and apply a second coat for long-lasting color.
- Add a Glossy Touch (Optional): If you prefer a glossy finish, top it off with a clear or orange-toned lip gloss.
Pairing Orange Lips with the Right Makeup
Balance is key when wearing a bold lip color:
- Neutral Eyes: Keep eye makeup minimal with beige or soft brown tones.
- Bronzed Cheeks: Warm up your complexion with a subtle bronzer or peachy blush.
- Defined Brows: Well-groomed brows frame the face and complete the look.
- Mascara Magic: A coat of volumizing mascara will enhance your eyes without overpowering your lips.
When and Where to Wear Orange Lipstick
Orange lipstick is perfect for various occasions:
- Daytime Chic: A softer orange with dewy skin and minimal makeup works beautifully for brunch or casual outings.
- Evening Glam: A deep, matte orange pairs well with winged eyeliner and a glowing highlight for nighttime allure.
- Summer Vibes: Orange lipstick is a summer staple—pair it with sun-kissed skin and light fabrics for a fresh, radiant look.
- Festival Ready: For a fun, daring style, experiment with neon oranges or ombré effects.
Embrace the bold and have fun experimenting with orange lipstick! Whether you’re new to bright colors or a lipstick aficionado, this shade is a must-try for a standout look.
8. Soap Brows
Achieve fluffy brows with Pearl Soap Brow Kit (available on Amazon).
Achieve fluffy, natural-looking brows using the Pearl Soap Brow Kit. The soap brow trend has taken over the beauty world for its ability to create full, feathered brows with minimal effort. Here’s everything you need to know to perfect this technique.
What Are Soap Brows?
Soap brows refer to a technique where a specially formulated soap or clear soap bar is used to shape and set brow hairs in place. Unlike traditional brow gels, soap brows offer a long-lasting hold and a brushed-up effect that stays put all day.
How to Achieve the Perfect Soap Brows
Gather Your Tools
- Pearl Soap Brow Kit (available on Amazon) (or a clear glycerin soap)
- A spoolie brush (available on Amazon)
- A setting spray or water
- Brow pencil or powder (optional)
Prepare the Soap
Lightly spritz your spoolie brush with setting spray or water to slightly dampen it. Then, rub the brush over the soap to create a light, gel-like consistency.
Apply the Soap to Your Brows
Brush the spoolie through your eyebrows in an upward motion to coat the hairs evenly. Adjust the direction as needed to create the desired fullness and shape.
Shape and Set
Use the opposite end of your spoolie or your fingers to press the brow hairs into place. If you have sparse areas, lightly fill them in with a brow pencil or powder.
Let It Dry
Allow the soap to dry completely to lock your brows in place for an all-day hold.
Why Soap Brows?
- Budget-friendly alternative to brow gels
- Long-lasting hold without stiffness
- Creates a naturally full and lifted look
Soap brows work well for all brow types and complement various makeup styles, whether you’re going for a soft glam or bold look. Try this technique with the Pearl Soap Brow Kit and enjoy effortlessly perfect brows!
9. Coral Blush
Warm up your look with Milani Baked Blush in Luminoso (available on Amazon).
Blush can completely transform your look by adding warmth and a healthy flush to your complexion. Coral blush, in particular, is a universally flattering shade that complements a variety of skin tones. If you’re looking to brighten up your makeup routine, Milani Baked Blush in Luminoso is a perfect choice. Let’s explore why coral blush is a must-have and how to apply it flawlessly.
Why Choose Coral Blush?
Coral is a balanced blend of pink and orange tones, making it ideal for adding warmth without looking too overpowering. It suits a wide range of skin tones:
- Fair Skin: A soft coral shade gives a natural flush without appearing too intense.
- Medium Skin: Coral enhances the warmth in your complexion for a sun-kissed glow.
- Deep Skin: A richer coral shade can provide a radiant pop of color that stands out beautifully.
Best Coral Blush Products
While Milani Baked Blush in Luminoso is a cult favorite, there are several other great options to consider:
- NARS Blush in Torrid (available on Amazon) – A slightly deeper coral with a touch of shimmer for a luminous finish.
- Tarte Amazonian Clay Blush in Captivating (available on Amazon) – A matte option that blends seamlessly into the skin.
- Fenty Beauty Cheeks Out Freestyle Cream Blush in Fuego Flush (available on Amazon) – A cream-based coral blush for a dewy, fresh look.
How to Apply Coral Blush Like a Pro
- Choose the Right Brush: A fluffy blush brush, like the Real Techniques Blush Brush (available on Amazon), ensures even application.
- Smile and Apply: Lightly swirl your brush into the blush and apply it to the apples of your cheeks.
- Blend Upward: For a natural, lifted effect, blend the blush upwards towards your temples.
- Layer for Intensity: If you want a bolder look, build up the color gradually rather than applying too much at once.
- Set for Longevity: Finish with a light mist of setting spray, like the Urban Decay All Nighter (available on Amazon), to keep your blush looking fresh all day.
Coral Blush for Different Makeup Looks
- Natural Everyday Look: Pair coral blush with a tinted moisturizer, mascara, and a nude lip for an effortless glow.
- Summer Glow: Use bronzer and highlighter alongside your coral blush for a sun-kissed, radiant effect.
- Glam Night Out: Complement coral blush with a bold lip color, like a glossy coral or peach-toned lipstick.
Final Thoughts
Coral blush is a versatile staple in any makeup collection. Whether you’re aiming for a soft glow or a bold pop of color, this shade is an easy way to bring warmth and vibrancy to your look. With the right application technique and product choice, coral blush can enhance your natural beauty effortlessly!
Makeup is all about having fun and expressing yourself—whether that means rocking a natural look, trying a bold trend, or playing with colors you’ve never worn before. There are no rules, just endless possibilities. So grab your brushes, experiment, and most importantly, enjoy the process!
Why not expand your knowledge even further by reading another makeup/beauty article here on Pink Femme? You can find them either via the menu at the top of the page or by clicking this link that will take you to the list of all the beauty articles.
When it comes to my choices for makeup and beauty products, I only use L’Oréal Paris (Available on Amazon). I have really sensitive skin and never once have I had any negative reaction to any L’Oréal product.
If you enjoy reading romance stories, take a look at my author page on Amazon where you will find all the novels that I have published so far.
Keep up to date with all my latest femme news with the fabulous Pink Femme Newsletter. Each Monday you’ll receive an email from me that will include a chapter from the novel that I am currently writing. I will also alert you to interesting information from articles that have not yet been published on Pink Femme. The Pink Femme Newsletter is the only place to see chapters from the novels before they are published. Sign up today: PINK FEMME NEWSLETTER.