If you ever wanted to know if overlined lips was actually a thing that girls actually did, then all you need to do is scroll through the Instagram feeds of your favorite influencers or celebrities. For instance, take a look at the Instagram accounts of Angela Ponce and Andreja Pejic and you will not need to scroll for long before you see overlined lips.
In truth we all have days when we look in the mirror and wish we could make our lips look fuller and bigger. It just so happens that overlining your lips is the quickest and easiest way to do just that.
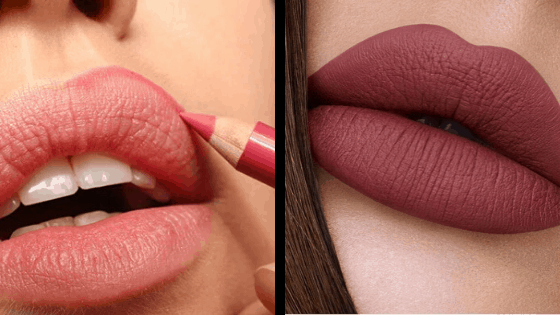
How to overline your lips?
- Exfoliate your lips gently.
- Smooth-On some lip balm for lasting hydration.
- Prime your lips to prevent fading.
- Choose your liner: neutral and natural.
- Shade the corners to prevent harsh contrasts.
- Define your cupid’s bow as a focal point.
- Complete your lip lining.
- Use a fill-in color a shade or two lighter than your liner.
- Blend the edges to create shadows around the edges of your lips.
- Finish by adding a little highlight to make your lips look even fuller.
If you want to give it a try and see if you can get a gorgeous feminine pout, keep reading to find out. Below are step-by-step instructions on how to overline your lips so that you can start practicing today.
1. Exfoliate Your Lips
Preparing your pout is just as important as lining your lips in order to achieve the perfect overlined lip look. Use a dedicated lip scrub to ensure your lips have a smooth, even surface without over-scrubbing the sensitive skin of your lips.
If you have never exfoliated your lips you will likely see a clear ridge line of skin cells around the edges of your lips that can potentially show through when you are done.
2. Smooth On Some Lip Balm
This is the pro step that most girls never do. Apply a lip balm.
Before you ask, “But why?” Keeping your lips hydrated is always a good practice in general. What the professionals know is that it also helps your lip products wear better.
3. Prime Your Lips
In just the same way as you apply primer prior to smoothing on your face makeup, it’s a good idea to start your lip makeup with a lip primer.
You don’t want your overlined lips to fade throughout the day and look like you did your lipstick without a mirror.
If you don’t have any lip primer on hand, use a small dab of concealer. Although not ideal, it is better than nothing.
4. Choose Your Liner
When it comes to choosing your lip liner, there are two things to keep in mind for the perfect overlined lip. Those are finish and color.
As regards finish… keep it natural. The purpose of overlined lips is to fake the appearance of a naturally full pout. You won’t want to use a lip liner that is too matte or especially not too shimmery. Stick to one that has a natural finish.
As regards color… keep it neutral. As I said earlier, you want your overlined lips to pass for your actual lips. While you can play around with color, your best bet is to stick to shades that are natural-looking.
If you are just practicing the technique then, by all means, use the lip liner that you have. Don’t let that hold you back from trying out the technique.
5. Shade The Corners
Use a precise lip liner to shade the outer corners of your lips, going ever so slightly outside the lines. By shading, you’ll be able to avoid a stark contrast between your lip liner and lip color.
6. Define Your Cupid’s Bow
The next step is to accentuate your cupid’s bow. In case you don’t know, your cupid’s bow is the little indentation in the center of your top lip. Lining just outside your natural lip line, draw an X just above your cupid’s bow.
7. Complete Your Lip Lining
Finish lining the rest of your lips. Remember to only go a tiny bit outside your natural lip line. This is really a case of less is more. Just a tiny bit too much and it will look completely unrealistic. This takes practice.
8. Time To Fill It In
Now that you have taken the time to carefully overline your lips, you don’t want to leave the rest of your lips bare.
When choosing a lip color, once again, like with your lip liner look for one with a natural finish.
As for the shade, it is a good idea to choose a color that’s one to two shades lighter than your lip liner to create a more flattering effect. What this does is make your lip liner into a shadow that, in turn, makes the rest of your lip area “pop out” and look fuller.
9. Blend The Edges
In contrast to cleaning up your lip liner look with a concealer as you would normally do, with overlined lips you actually want to do the opposite.
Use your fingertip or a lip brush to gently smudge your liner, creating a more natural, softer line. This will maintain the shadow effect I mentioned earlier.
10. Add A Little Highlight
Once you have practiced overlining your lips like a pro and are ready to take thinks to a whole new level, add some highlight.
Use just a little powder highlighter onto your cupid’s bow. Be careful here. It is easy to use too much highlighter and that will completely ruin the look and you may even need to start over.
Now, it’s time to pucker up, and flaunt your new look lips.
Me vienen bien todos los consejos y trucos.