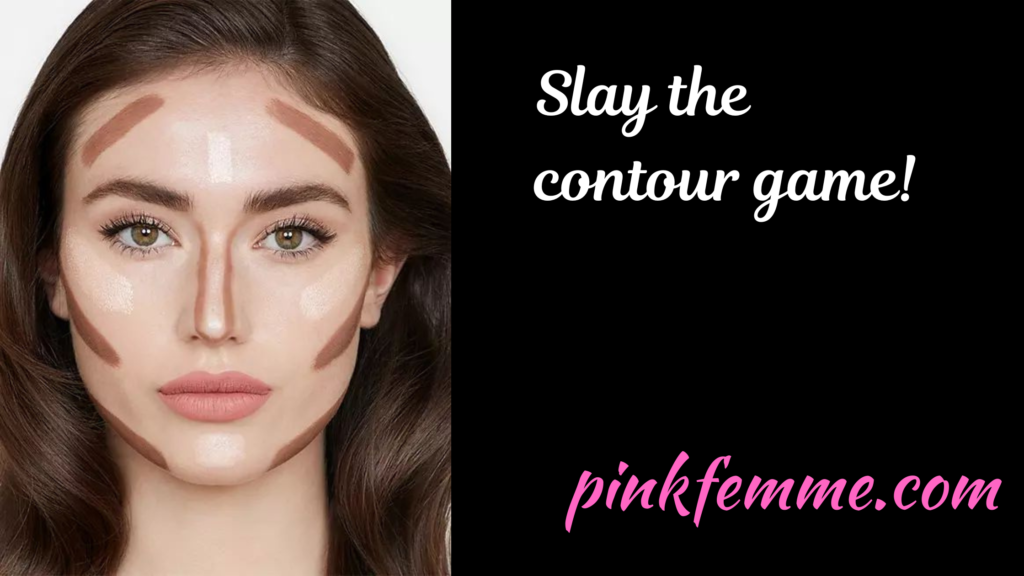
Knowing how to contour is a makeup skill that is vital to master. Just take one quick scroll through your social media feeds and it’ll become clear that contouring is a beauty trend that shows no signs of slowing down. The contouring technique, which involves using dark and light face makeup to enhance—or slim down the appearance of—certain facial features, has become a go-to for professional makeup artists and girls next door alike. However, Contouring makeup can seem pretty difficult to master.
Firstly, what products exactly, are you supposed to use? And where are you supposed to put them on your face for that sculpted look, anyway? Plus, should you use powder or cream products? It’s enough to make anyone’s head spin, especially if you are new to the world of makeup. It might cause some girls to shy away from trying to learn how to contour altogether.
Here is a list of the steps that you need to follow:
- Contour Step 1: Color Correct
- Contour Step 2: Apply Foundation
- Contour Step 3: Conceal
- Contour Step 4: Find Your Highlighting And Contouring Products
- Contour Step 5: Highlight
- Contour Step 6: Determine Your Face Shape
- Contour Step 7: Contour
- Contour Step 8: Set Everything
Luckily, this makeup trend isn’t nearly as complicated as it might seem on the surface. Here’s an easy step-by-step detailed breakdown on how to contour like a pro.
Contour Step 1: Color Correct
First, hide the appearance of any skin discolorations such as dark spots or dark circles under the eyes with color-correcting concealers. I use the L’Oréal Paris True Match™ Color Correcting Crayons (available on Amazon).
This line of color-correcting crayons comes in five shades (yellow to hide dark spots, green to neutralize redness, and peach, bisque, and orange to mask dark circles on light, medium, and deep skin tones, respectively).
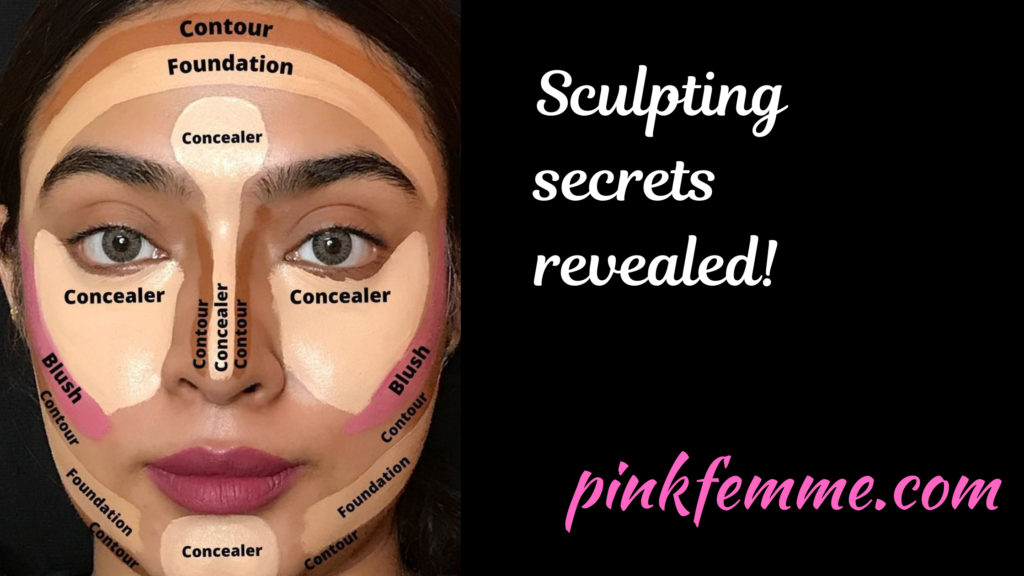
Apply your color-correcting concealer shade (or shades!) of choice sparingly to targeted areas and blend well using the L’Oréal Paris Infallible Blend Artist Concealer Blender (available on Amazon). The small, pointed tip of this makeup blender is perfect for maneuvering around hard-to-reach areas, like the sides of your nose.
Contour Step 2: Apply Foundation
Next, create an even canvas by swiping on a liquid foundation. Try the L’Oréal Paris Infallible Pro-Matte Foundation (available on Amazon) for a demi-matte finish, medium coverage, and air-light texture that is long-lasting.
Since this foundation has a matte finish, it can be a great pick for those with oily skin. If you happen to prefer a radiant finish, try the L’Oréal Paris Infallible Pro-Glow Foundation (available on Amazon).
For either option, smooth the foundation onto your skin and then buff it onto your face using the L’Oréal Paris Infallible Blend Artist Foundation Blender (available on Amazon). This makeup blender is designed with an exclusive plush material and an easy-to-grip shape that can help ensure your foundation goes on uniformly.
Contour Step 3: Conceal
Sometimes your foundation can’t cover every single imperfection. If you can still spot a blemish peeking through, you’ll want to follow with concealer.
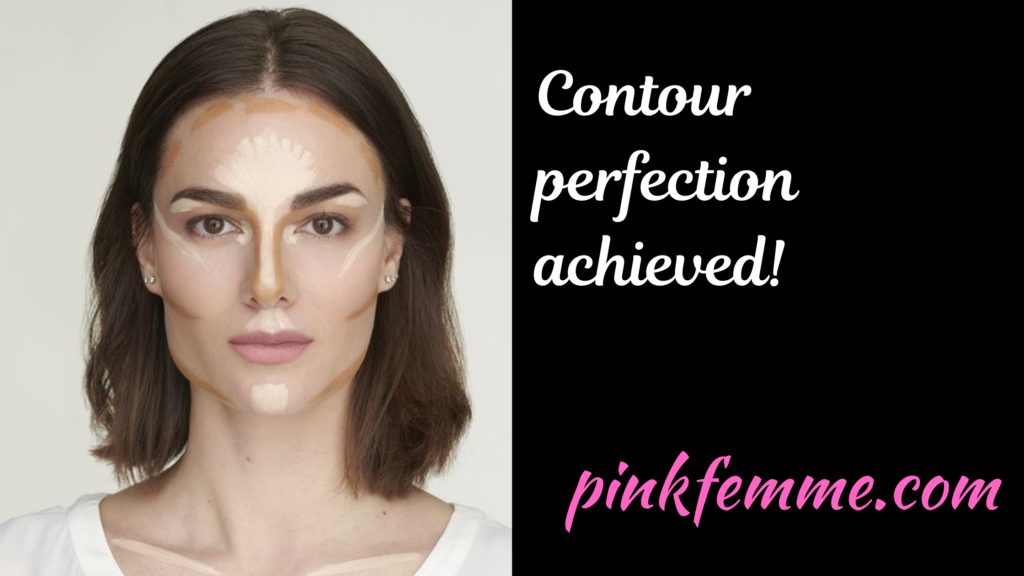
I dot the L’Oréal Paris True Match™ Super-Blendable Multi-Use Concealer (available on Amazon) wherever I’m in need of a little extra coverage, then blend it out with my makeup blender.
Contour Step 4: Find Your Highlighting And Contouring Products
In order to contour the right way, you’ll need two products: one for highlighting and one for contouring. For highlighting, pick a color that’s two shades lighter than your natural skin tone. For contouring, pick a color that’s two shades darker than your natural skin tone. Easy enough, right?
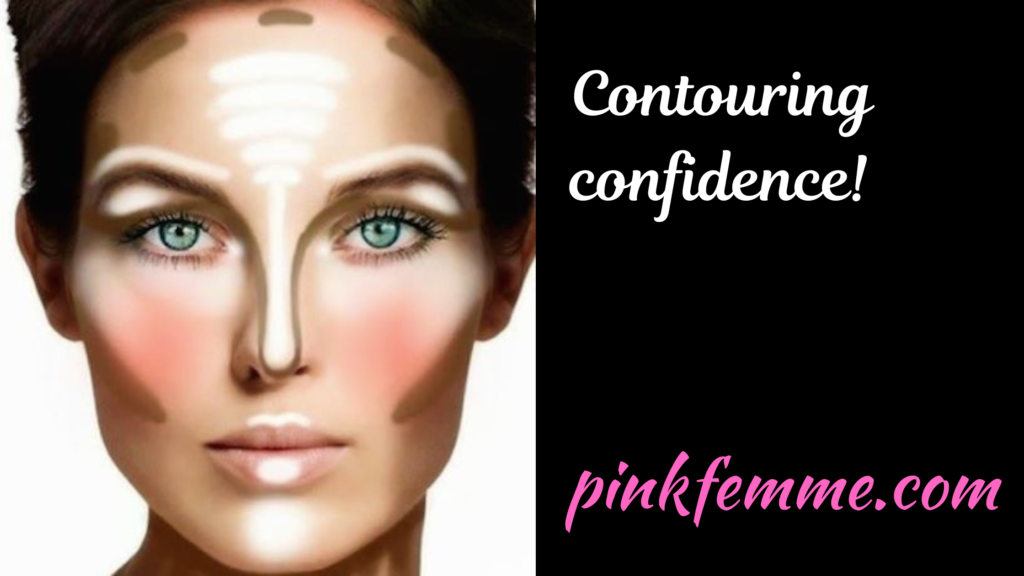
If you want a cream contour, try the L’Oréal Paris Infallible Total Cover Concealing and Contour Kit (available on Amazon), one of the L’Oréal Paris Infallible Longwear Shaping Foundation Makeup Sticks (available on Amazon). Alternatively, if you’re having trouble getting your hands on a cream contour product—repurpose a concealer that’s too dark for your skin tone.
If you want a powder contour…try the L’Oréal Paris Infallible Pro Contour Palette (available on Amazon).
If you want a liquid highlight, try the L’Oréal Paris True Match™ Lumi Glow Amour Glow Boosting Drops (available on Amazon), L’Oréal Paris True Match™ Lumi Glotion Natural Glow Enhancer (available on Amazon), or L’Oréal Paris True Match™ Lumi Liquid Glow Illuminator (available on Amazon).
If you want a cream highlight…try the L’Oréal Paris Infallible Longwear Highlighter Shaping Sticks (available on Amazon) or L’Oréal Paris Infallible Galaxy Sticks (available on Amazon).
If you want a powder highlight, try the L’Oréal Paris Infallible Crushed Foils Metallic Highlighter (available on Amazon), L’Oréal Paris True Match™ Lumi Shimmerista Highlighting Powder (available on Amazon), L’Oréal Paris True Match™ Lumi Glow Nude Highlighter Palette (available on Amazon), or L’Oréal Paris True Match™ Lumi Powder Glow Illuminator (available on Amazon).
Contour Step 5: Highlight
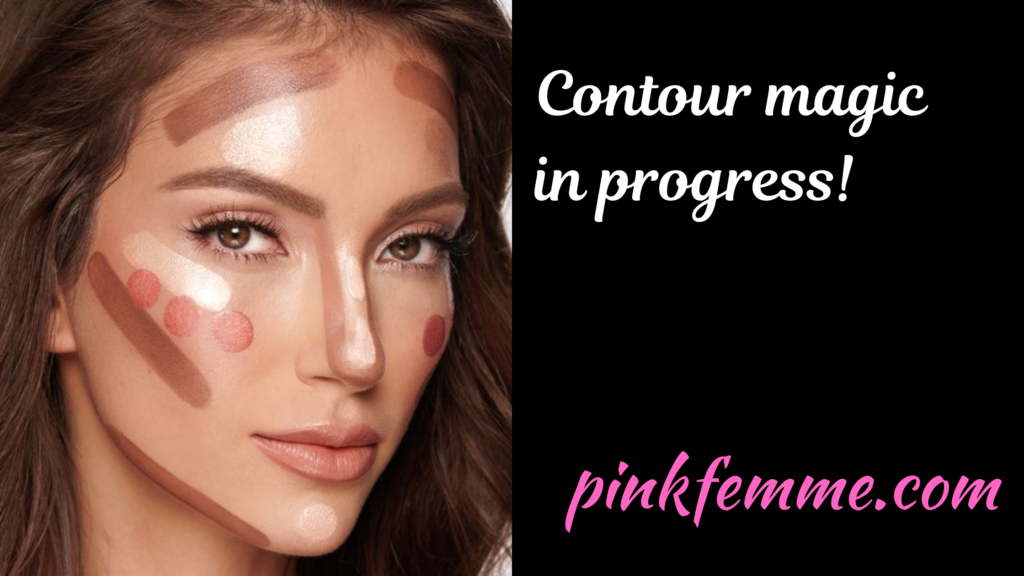
Create the appearance of extra dimension by highlighting key areas of your face using the highlighter of your choosing. These key spots include under your eyes, around the inner corners of your eyes, down the bridge of your nose, in between your eyebrows, beneath the arch of your eyebrows, above your cheekbones, along your cupid’s bow, and down the center of your chin.
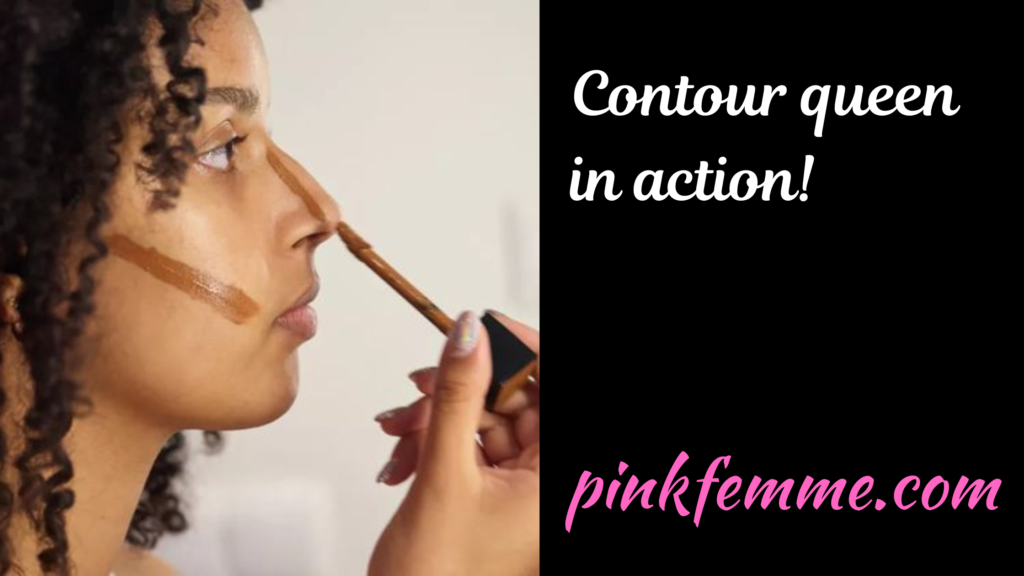
To apply a powder highlighter, try using a fan brush. For a liquid highlighter, use a makeup blender or your fingers – if you want to take a hands-on approach.
Contour Step 6: Determine Your Face Shape
There isn’t a single foolproof way to contour. What the pros know and you might not is that how you contour should depend on your face shape. This means that before you break out your chosen contour product(s), you’ll need to determine your face shape. Follow our handy guide, below.
Square: You have a square-shaped face if the width of your forehead, cheekbones, and jaw are all nearly the same. Those with square-shaped faces should soften their edges by contouring along the perimeter of their face.
Round: You have a round-shaped face if all your measurements are equal. The difference between a square-shaped face and a round face is that you’ll have gentle, rounded corners. Those with round-shaped faces should create a more angular shape by contouring the sides of their forehead, along their temples, below their cheekbones, and on their jawline.
Oval: You have an oval-shaped face if your forehead is larger than your jawline and your face length is larger than the width of your cheekbones. Also, the angle of your jaw will be rounded. Those with oval-shaped faces should focus on contouring smaller details they may want to perfect. For example, if you want a smaller-looking nose, contour down either side of your bridge.
Long: You have a long or oblong-shaped face if your forehead, cheekbones, and jawline are similar in size but your face length is the largest. Those with oblong-shaped faces should create the illusion of a shorter shape by focusing contour product along their forehead and jawline.
Heart: You have a heart-shaped face if your forehead is the widest part of your face. Your chin will also be pointed and you may have a widow’s peak at your hairline. Those with heart-shaped faces should contour the bottom half of their face to smooth the shape of their chin.
Diamond: You have a diamond-shaped face if you have a pointed chin and high cheekbones, with a narrower hairline than that of a heart-shaped face. Those with diamond-shaped faces should contour the sides and center of their forehead to make it appear longer.
Contour Step 7: Contour
Now it’s time to contour! Reach for the contour product (or darker color of concealer) you chose and use it to accentuate specific areas on your face. Popular places to contour include along your hairline, under your cheekbones, and along the sides of your nose. However, for the best results, be sure to contour according to your face shape as detailed above.
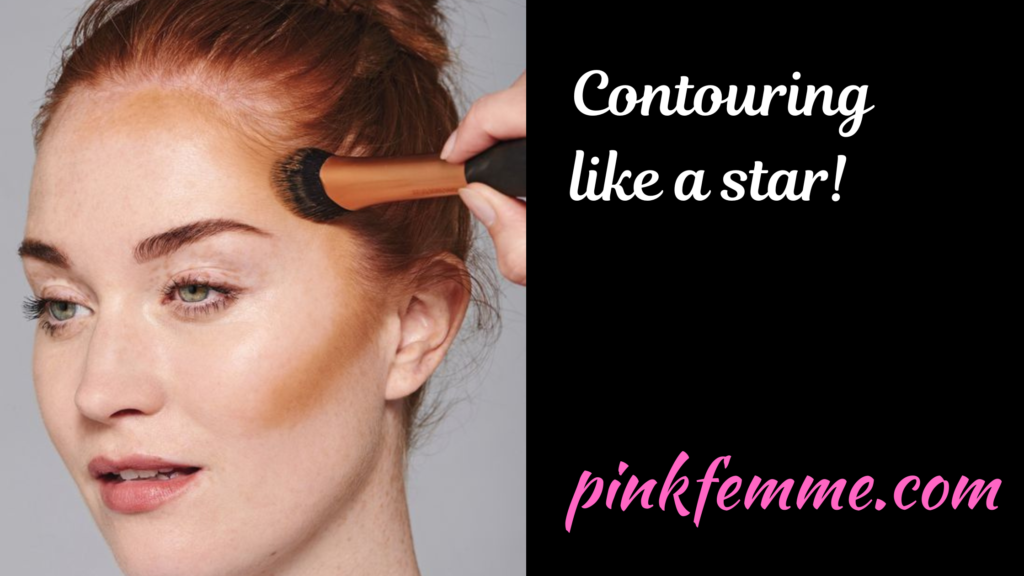
When you know where exactly to apply your contour product, blend it onto your face with the L’Oréal Paris Infallible Blend Artist Contour Blender (available on Amazon). With flat, slanted edges, this makeup blender seamlessly moves across the contours of your face and ensures makeup blends smoothly onto skin. Of course, that’s only if you’re working with a cream contour product.
For powder contour products, try an angled contour makeup brush. Dip your brush lightly into the powder, and dust it on wherever you want a more sculpted look. Clean any excess product off the brush, then use it to blend out and diffuse any harsh lines.
Contour Step 8: Set Everything
For most people, contouring and highlighting aren’t everyday activities. They’re for those special occasions when you want to look extra glam. And obviously, after putting in all that effort to be sculpted to perfection, you’ll want your contoured look to last until that aforementioned special occasion has come to an end.
All that’s to say, you’ll need to set your makeup. Instead of using a setting powder and adding another layer to your makeup, you’re already wearing a full face seal in your look with a few spritzes of the L’Oréal Paris Infallible Pro-Spray & Set Makeup Extender Setting Spray (available on Amazon).
Why not expand your knowledge even further by reading another makeup/beauty article here on Pink Femme? You can find them either via the menu at the top of the page or by clicking this link that will take you to the list of all the beauty articles.
When it comes to my choices for makeup and beauty products, I only use L’Oréal Paris (Available on Amazon). I have really sensitive skin and never once have I had any negative reaction to any L’Oréal product. Keep up to date with all my latest femme news with the fabulous Pink Femme Newsletter. Each Monday you’ll receive an email from me that will include a chapter from the novel that I am currently writing. I will also alert you to interesting information from articles that have not yet been published on Pink Femme. The Pink Femme Newsletter is the only place to see chapters from the novels before they are published. Sign up today: PINK FEMME NEWSLETTER.
